Arduino Setup
Drivers
To make the Digispark work with Arduino on Windows, you need to install drivers.
Drivers
Download Digispark drivers for Windows. Unzip and run "Install Drivers.exe".
Setup Arduino-IDE
- Download and install Arduino IDE
- Start Arduino IDE
- Go to File > Preferences > Additional Boards Manager URLs and paste
https://raw.githubusercontent.com/ArminJo/DigistumpArduino/master/package_digistump_index.jsonthen click OK to save and close the Preferences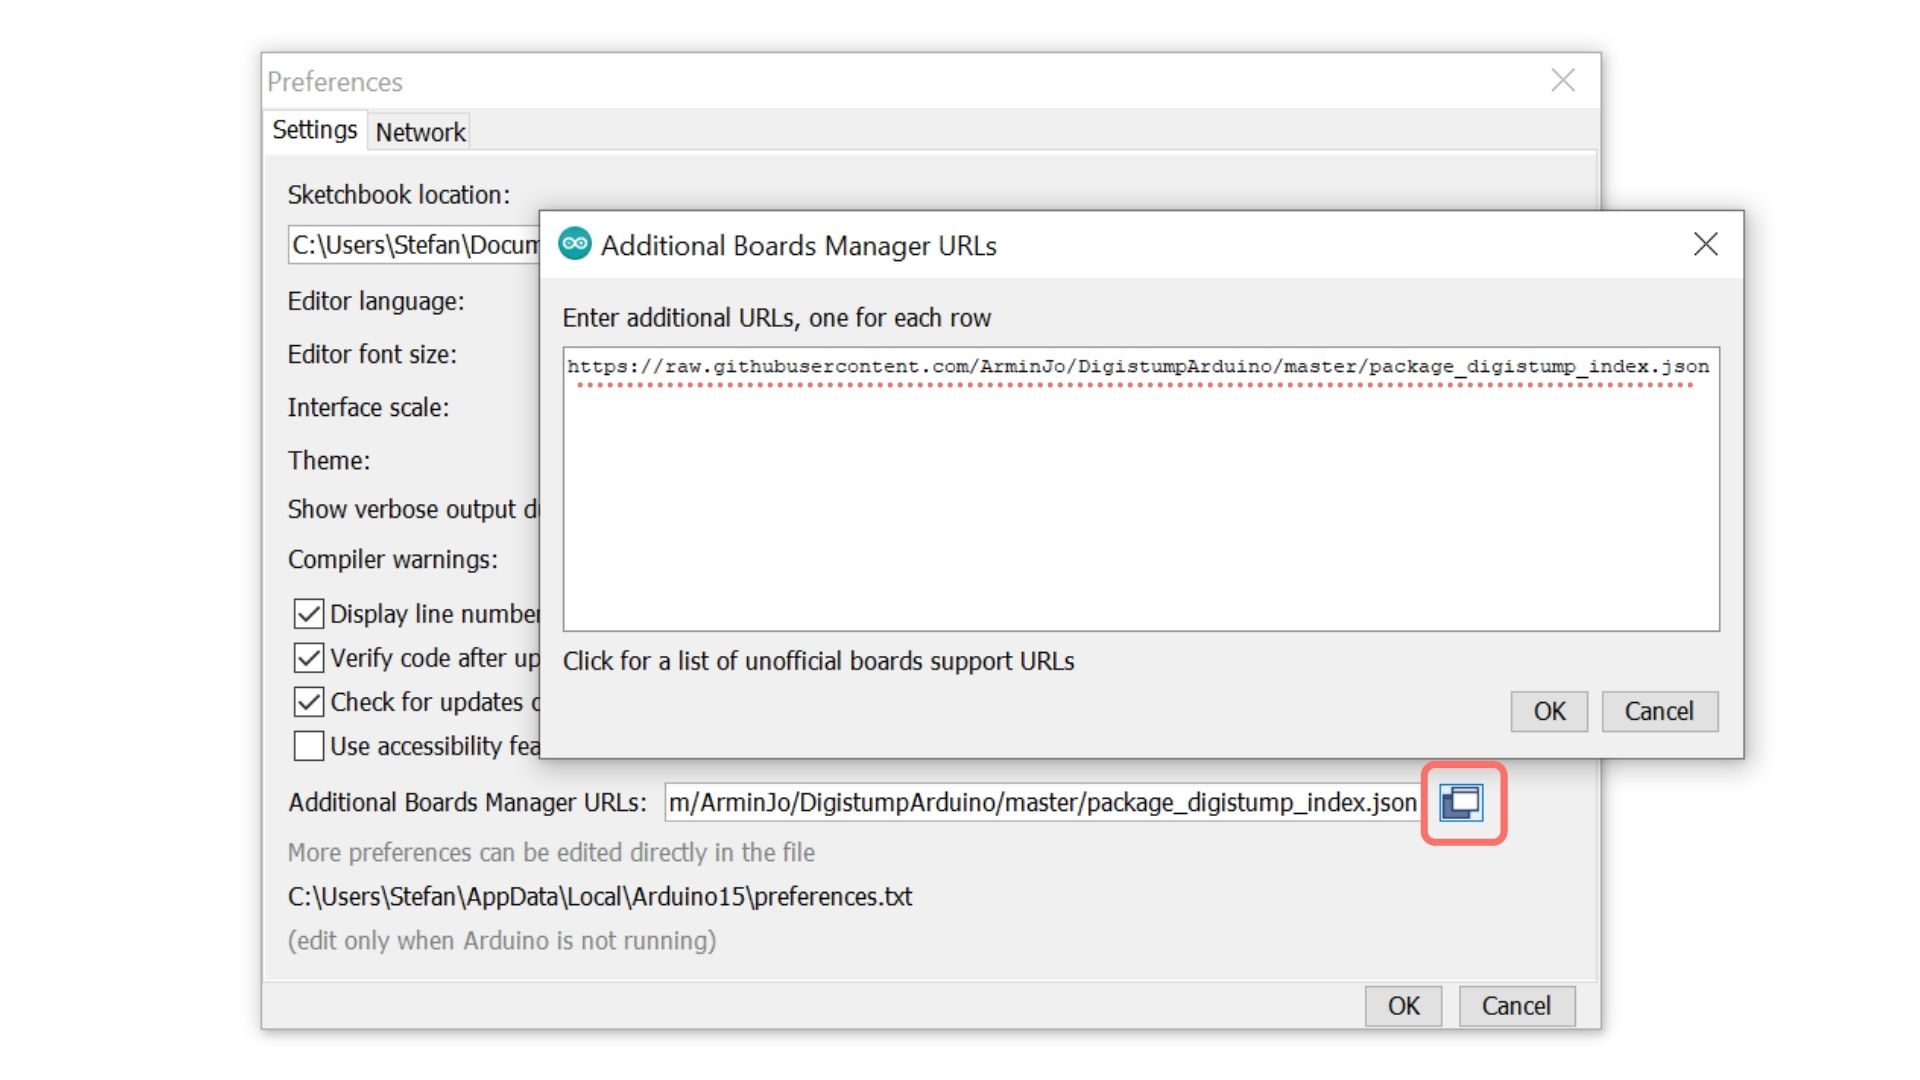
- Go to Tools > Board > Boards Manager, search for
Digisparkand install "Digistump AVR Boards"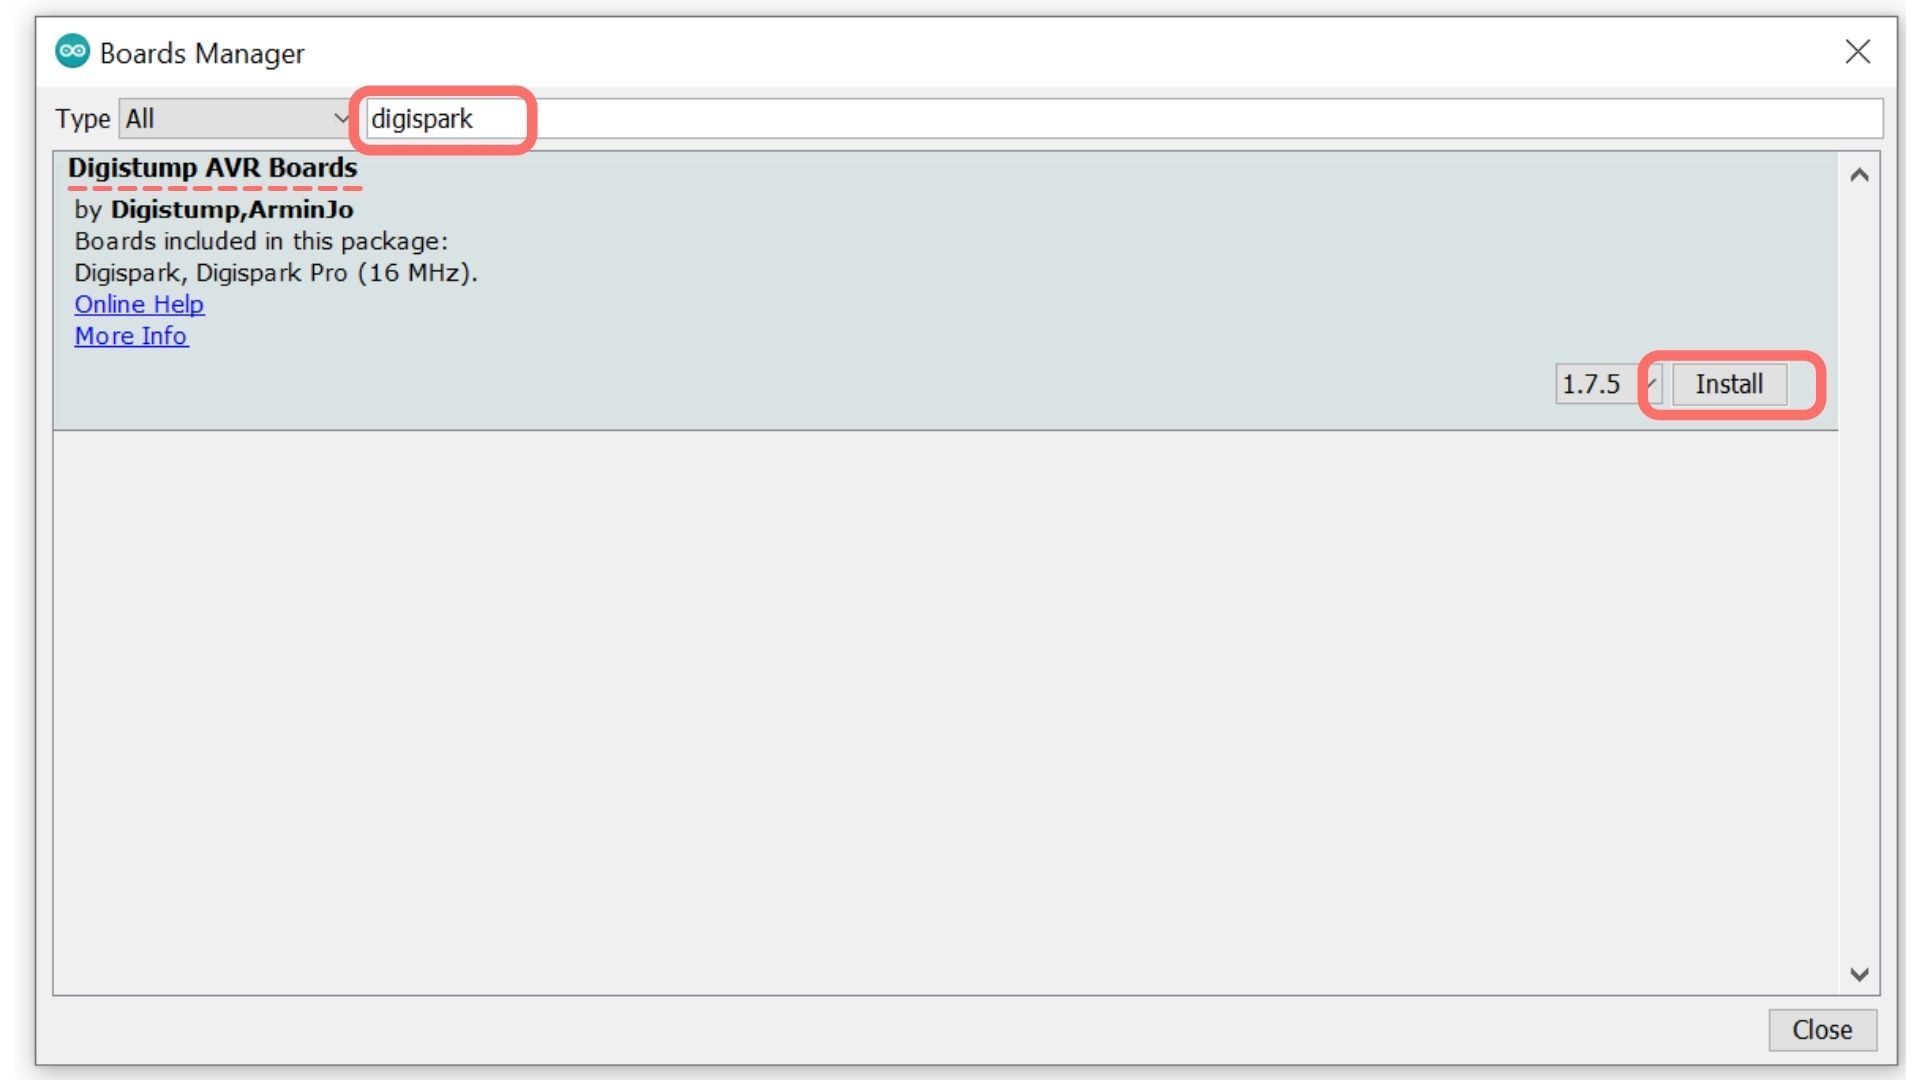
Flash example sketch
You can upload an example to ensure everything is correctly set up and working.
6s delay
The Digispark goes into a bootloader mode for 6 seconds when plugged in. You can only upload new firmware in these 6s. Afterward, it will leave this mode and run the code you flashed onto it. So you always have this 6-second delay before your code starts.
- Go to Tools > Board > Digistump Boards and select Digispark
- Open File > Examples > Digispark_Examples > Blink
- Click Upload (in the top left)
- Plugin your Digispark when told (check the output at the bottom)
When done, the LED on your Digispark should start blinking.
tip
One user reported that on Kali Linux, they had to copy the file https://raw.githubusercontent.com/micronucleus/micronucleus/master/commandline/49-micronucleus.rules to the /etc/udev/rules.d folder.